Introducing the Kids of the Rocket Fund: Shawn and Shawnee

Ahimsa Media is comprised of a cast of interesting characters, so it isn’t a stretch for us to develop a new plethora of personalities – online characters that is.  Our inaugural lady was Emme Rogers, and since then character development has become a creative niche for us.  Amazing how it helps us to deal with all our own multiple personalities by creating characters online from novels, movies and television series; in addition to those for non-profits and businesses.  Incredible how liberating it can be for an organization to have a voice that can have fun, and doesn’t have to wear a tie or an uncomfortable set of heels.

Our latest delve into character creation has been with the Shaw Rocket Fund.  They are already known throughout Canada as a champion and funder of children’s, youth and family television programs. However, much of their exceptional research into youth, media and technology was unknown.  This year also saw changes in their annual Rocket Prize judging to include any entry’s digital content, in addition to the TV show.  This set the stage for the Fund themselves to enter the digital space and begin participating in both interactivity and convergence.  Enter Shawn and Shawnee Rockett.

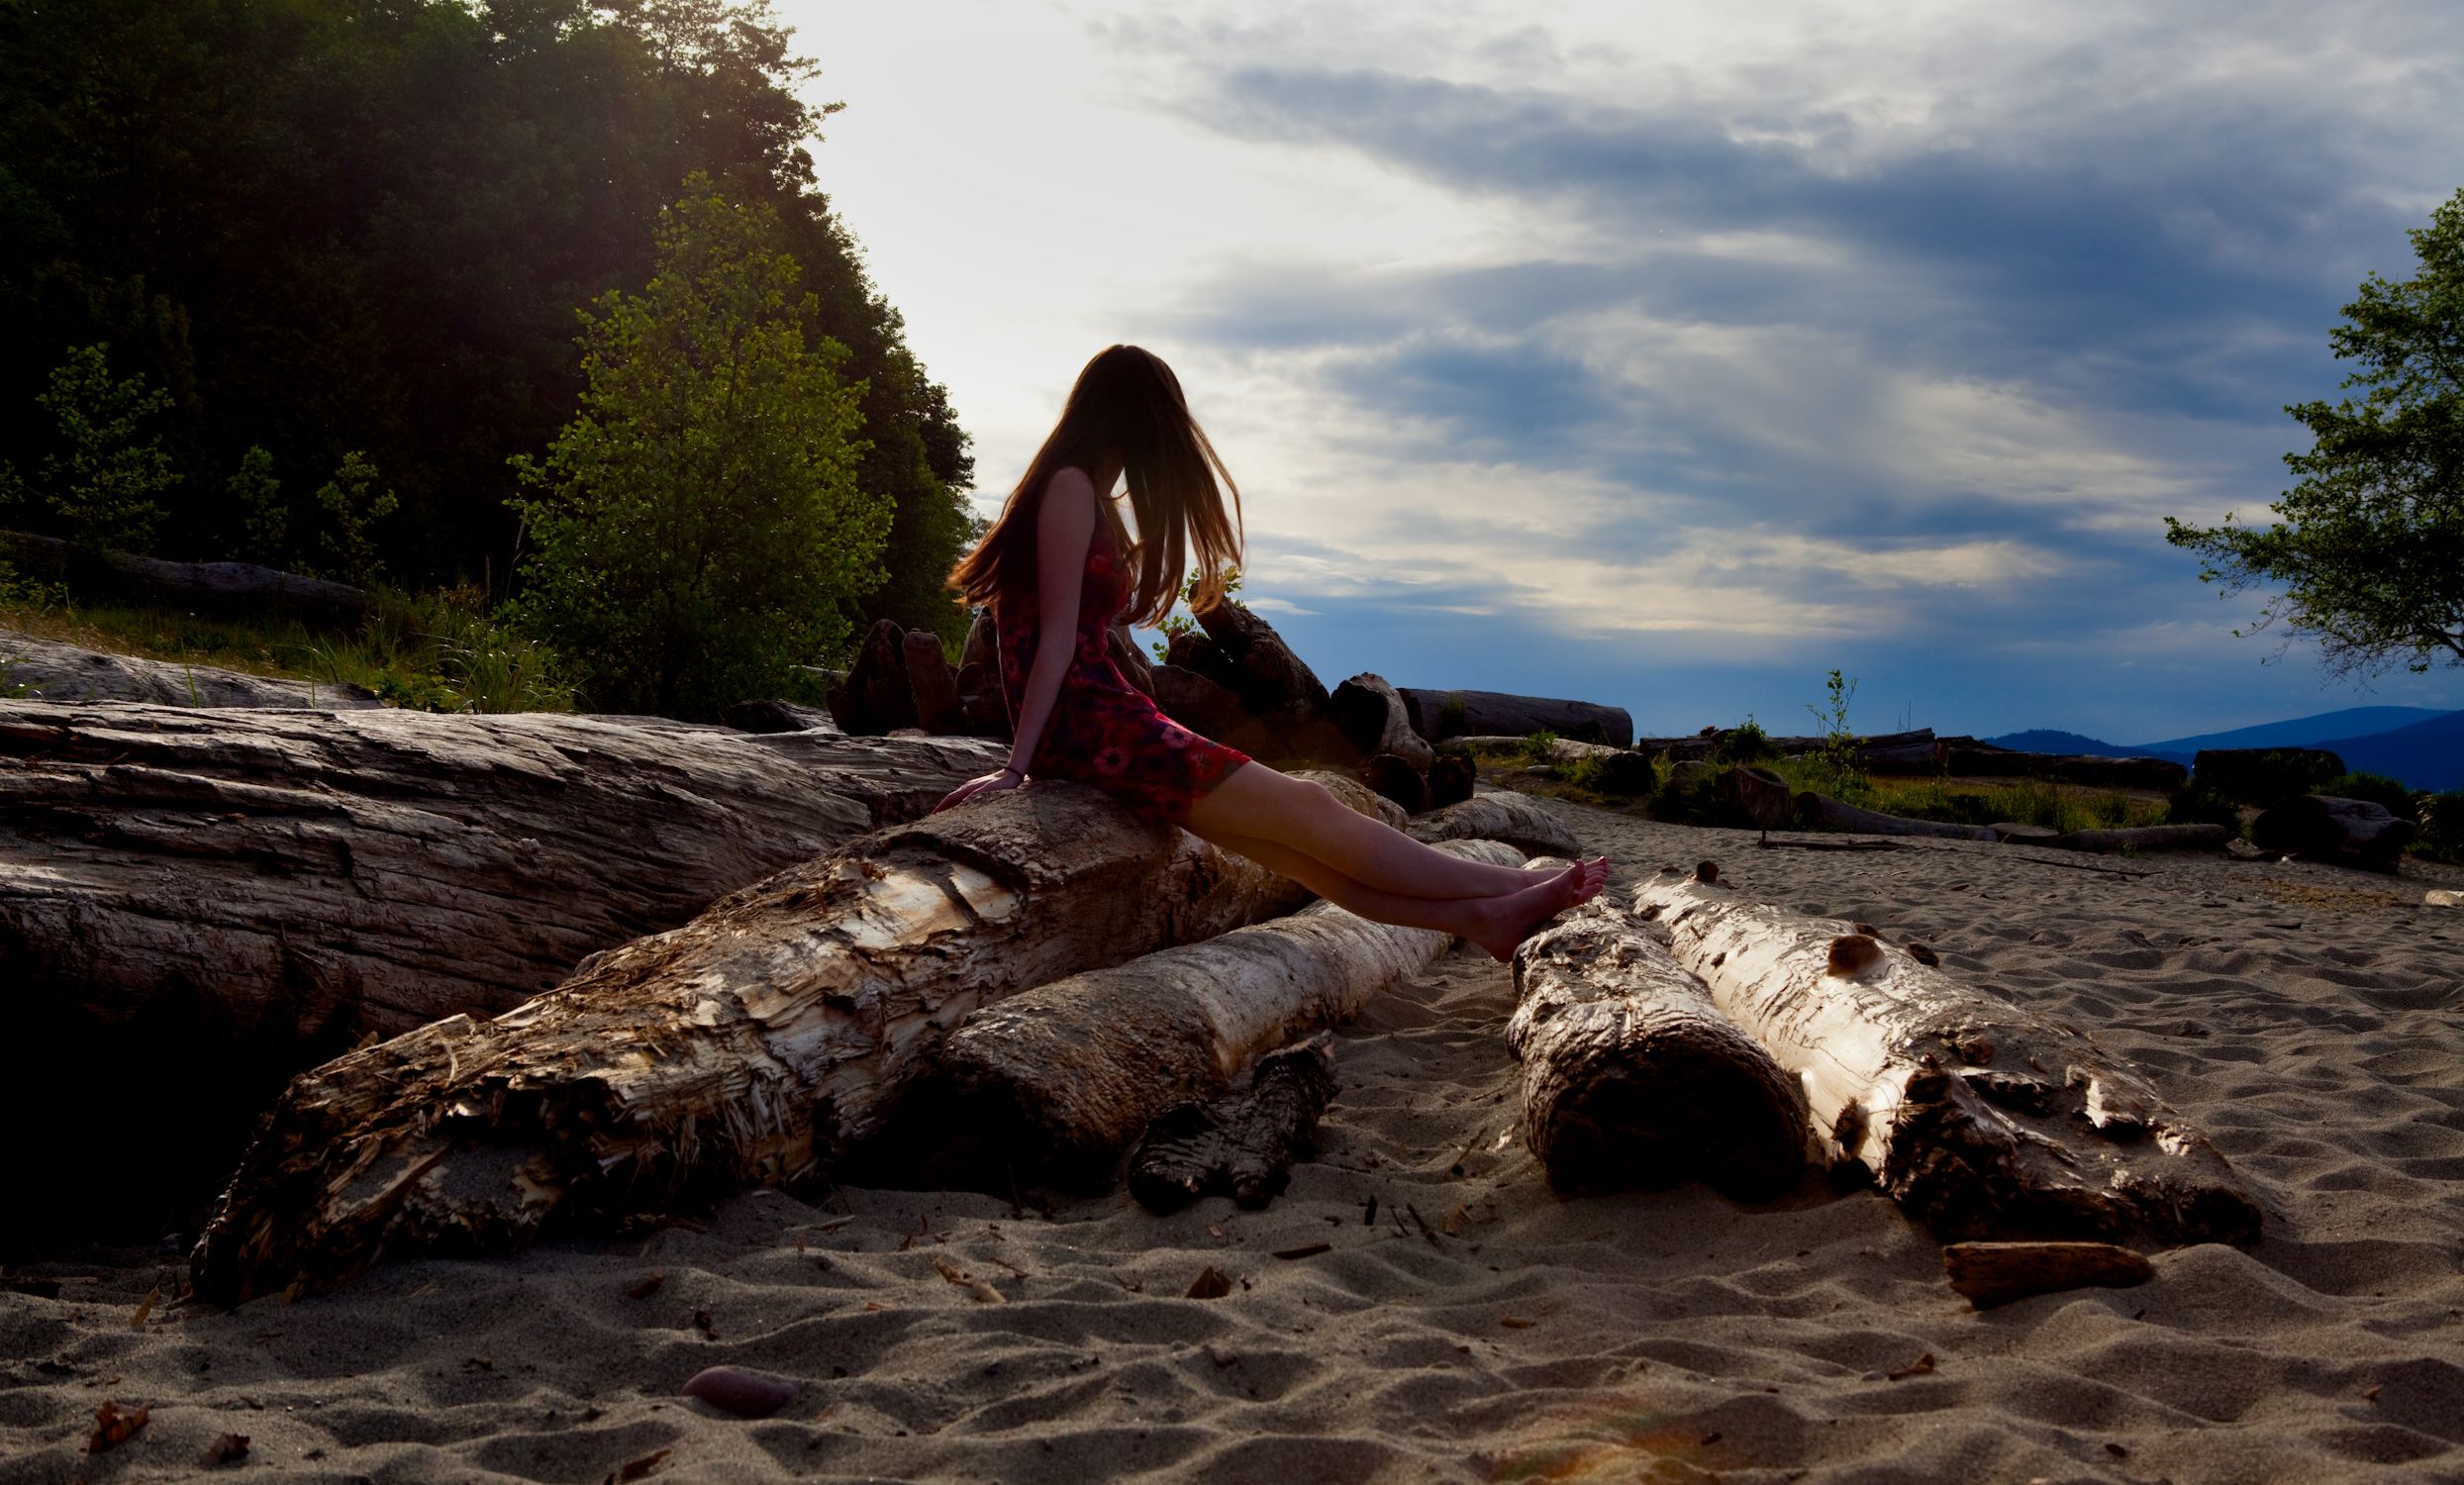
Shawnee enjoying herself at the beach.

Shawn playing it cool

We built this delectable duo and have raised them to the stage of passing the reigns back to the Shaw Rocket Fund, who will now guide the cousins on their future path.  To accompany our new friends, we also introduced interactive feeds for the company itself.  In a time when convergence is becoming a crucial key to industry success, the CMF creates an experimental funding stream and broadcasters are learning to navigate the digital space, character driven online narrative has helped place the Shaw Rocket Fund amongst some of today’s broadcast industry innovators.  Despite still being only a few months old, the digital world is beginning to embrace Shawn and Shawnee.  So here they are:

The Characters:
Shawn and Shawnee Rockett are cousins. They were both born a few years apart, but on the same day of the year, their great grandfather’s birthday – hence their names.  They are both named after their Great Grandfather, Shawn Rockett.  And yes, their pops, whom are brothers had a bit of a spat over this, but both are terribly stubborn and he was both of their favourite grandfather.  The cousins, on the other hand, are the best of friends, and although they tease each other incessantly, they have gone into business together and love working together.  Their company is a Canadian Production House focused on creating children’s and youth television.

Shawn Rockett

Shawn Rockett


In his late twenties, Shawn is still young at heart, a personality trait often reflected his work where he focuses on youth programming.  He loves his music, bickering with Shawnee and pushing life to the extreme.  He considers himself a bit of a Casanova, much to Shawnee’s amusement.  Shawn also loves being at the cutting edge of convergence and keeps an eye out for new and exciting technology.

Shawnee Rockett

Shawnee Rockett


Shawnee is a couple of years younger and places more focus on children’s and tween TV.  She’s a lover of everything Disney, her cats and and is a bit of a giant kid at heart.  She still loves to climb trees and splash in puddles in her bright red wellies.  Quirky would definitely be the word for her. She loves her folk music.  Yes, she still watches Saturday morning cartoons.  She already is hooked online, chatting with other characters and youth programmers like Seth on Survival and Ruby Skye PI

We loved developing these two, and are sure the Shaw Rocket Fund will equally enjoy creating their voices…

…as for us onto the next character!

Liz Joins #mobilersca to Experiment with the Android Galaxy Smartphone

Love any excuse to sing the praises of our team and I am most pleased that Liz Kearsley just gave us such an excuse.

Liz has been selected to be one of Canada’s first Mob!lers!  Samsung Canada picked her and 29 other 20-somethings living in Canada to take part in a competition with their new Android Galaxy S Vibrant Smartphones. Liz and her Team Vansung will duel it out against five other teams in Montreal, Toronto and Vancouver for cash and prizes, including a trip to Korea, in 4 challenges designed to experiment with transmedia with their Galaxy Smartphones.

Before the fun started, Samsung set the guys a mini challenge in Toronto which Liz’s Team Vansung won.

Mohammed Hassan-Ali

Here are Liz and her teammates:


Mohammed Hassan-Ali – @skysurfer64

Desired Superpower: To change the weather, so everyday he can avoid ever getting caught in those Vancouver downpours.


In Real Life: Grad Student studying Biomedical Physiology and Kinesiology

Gyslain Lalonde

Gyslain Lalonde

Desired Superpower: Batman Wannabe

In Real Life: Server and reality TV talent


Chris McGuire

Chris McGuire @chrisonhismac

Desired Superpower: To be untouchable, yet imperceptible.

In Real Life: Web & Mobile Developer


Peter Verge

Peter Verge @peterverge

Desired Superpower: Snooping on Other’s Text Messages (a fly on the cell, if you will)

In Real Life: All Round Personality, MC and Broadcast Journalist in the making

Liz Kearsley

Liz Kearsley @LizKearsley

Desired Superpower: Information Osmosis (not surprising, as we see her similarities with an amoeba)

In Real Life: PhotoJournalist

Please help us to cheer them on in their last 4 competitions by keeping an eye on the Samsung Mobile Canada facebook page.  Go Vansung Go!

Tips for Creating Music Video Montages

When I was in high school, a friend and I got more than a little obsessed with making music videos. When I say this, I mean we’d mostly dress up and dance around lip-synching in front of her Macbook, recording ourselves into iMovie. Fast-forward a fews years later, and I’m a working musician, making my own music and starting to think about making some music videos. The first video I started is still being shot, but over the summer another friend and I had an idea to record and film an acoustic cover of a rap song, to serve as a fun contrast to my own music, which is decidedly more on the indie-folk end of the spectrum. Behold my cover of Nicki Minaj’s “Itty Bitty Piggy:” (Disclaimer: there are a few swear words in here. It’s a rap song. Maybe don’t play this when the kids are around…)

[youtube=http://www.youtube.com/watch?v=1LtWIHsk10E]

My friend Alison Mah and I figured out the concept for the video, and she filmed and edited the clip. She did such a great job of it that she inspired me to try my own hand at video-editing. Alyzee, my fellow Ahimsa Media intern, and I shot a whole bunch of footage with the intention of making a fun tribute video for our teen-friendly character, Shea. As this was a video ostensibly made by a teen with the target audience of other teens, and also because Shea is a fictional character, it was important not to show too much of my face in the footage. This was a challenge, but I think it actually added to the accessibility of the video in the end. Here is the video:

[youtube=http://www.youtube.com/watch?v=YD6-EZV_yt0]

This post is of necessity not going to be a step-by-step guide about how to manually edit videos, as there are myriad video-editing programs out there, and I am by no means an expert on any of them. However I did learn some things in the process that I wish someone had shared with me:

1) Getting timing exactly right the first time IS important. Little gaps, or strange transitions make for awkward interruptions in the video that really are noticeable. Make sure to be as exact as possible about transitions as you go through your footage. You really, really don’t want to go back and fix every transition. Believe me.

2) Play around, both in the shooting and editing process! Lots of my favourite moments in Shea’s video came about by chance or whim. I had actually finished editing the clips together before I discovered that I could play around with contrast and colour in iMovie. I then went through and played with each separate clip’s colour and contrast until I was happy with them. The colours are definitely my favourite part of the video, and give it a whimsical vibe.

3) If you are making a music video montage like we did, look for a song that matches what you want to say in the video, but try not to make it too literal. If the song mentions eagles, and you show a shot of an eagle flying, it might be a little too contrived. Try to be unobtrusively quirky and unexpected in your images, no matter the subject matter. Everyone appreciates a clever image/lyric/music match-up.

4) Make sure to name and tag your video appropriately. The most prevalent part of the name should be to credit the musician. For example, we called Shea’s video “Hannah Georgas – The Beat Stuff tribute,” after the artist and title of the song we made the montage around. The video is yours, but the music is the musician’s. Credit them!

5) Most of all, have fun. If you’re making a video-montage, what better time is there to play around with effects, timing, and images? With modern technology, everyone can be a passable film-maker and graphics editor. Take advantage of it! Explore as you go! Video-editing can be a time consuming process, but it doesn’t have to have to be painful. And in the end, you have a guaranteed crowd-impressing product. (Lots of people don’t realise how easy it is to edit videos…)

Tips for Creating a Personalized YouTube Channel

In July my knowledge of personalizing YouTube Channel pages went up by about 100 percent. Erica assigned Liz and I the task of creating and personalizing YT Channels for Ahimsa characters Shawnee and Shawn Rockett (of the Shaw Rocket Fund), and for Shea, Ahimsa’s teenage character online.

I’d never tried my hand with personalizing YT Channels before and thought it should be easy, just like personalizing one’s desktop background. To my surprise, I found that just learning the ropes of YT Channel personalization takes a significant amount of time and experimentation. After spending many an ungainly hour on the project I thought I must just be YouTube-challenged, and so sought Liz’s help to speed things along. I was relieved to find that Liz – talented as she is with manipulating digital photos – uttered as many expletives as I did while we worked on getting the YT background image just right. Erica calmed us both by assuring us that personalizing the web page takes much longer than you’d think it would, and that after it’s completed, things move much more smoothly. (They do. And it’s such a pleasure to admire the finished product in the end).

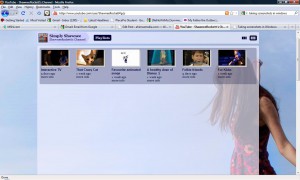
I always admire the colours on Shawnee Rockett’s YouTube channel

So to save all of you some time when personalizing your own YT Channels, here are some good-to-know tips:

1.There is no real ideal size for a YT background image, so don’t bother Googling it to see what size picture other YT users are using. This is because as you add more material to the Channel, the page will grow longer but your image will not. You can cope with this setback by choosing a background colour that will soften the line where the text exceeds the picture. The width that Liz and I found worked best for her photos was 1300 pixels.

We chose a deep grey background to blend in with Shawn Rockett’s teal and deep blue channel colours.

2. Depending on the size of the computer screen being used, the sides of the image displayed may be cut off. So while the edges of the image may show up on your screen, they may be lost on smaller monitors. For this reason, don’t pick images that have a lot of the subject on the extreme edges of the screen as they might become invisible to other viewers.

3. This restriction poses the problem of having a very small margin in which to display your subject on the Channel page. Pushing the subject too far towards the centre of the page will make the image disappear behind the wrapper, and moving it too far towards the edges is risky as well (see tip 2). You can increase how much of the background image is visible by making the wrapper totally or partially transparent.  Do this by clicking “advanced options” under the Themes and Colours tab and adjusting the “Wrapper Transparency” option with the drop-down menu given.

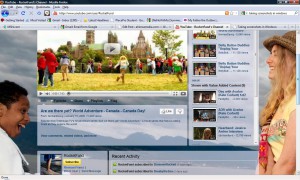
We made the outer wrapper 100% transparent and the inner wrapper 40% transparent so that more of the background picture would appear.

4. When you’re picking the colours to go in the fields in “advanced options”, you need not be limited to the 56 colours offered in the YT grid. There are 216 html colour codes you can find online. Enter the codes for the colours you like in the grids to give yourself more  freedom when designing your page. Name and save the combination of colours you decide on in the top left field of “advanced options” so that you can apply this palette with a single click on other YT Channels you might personalize.

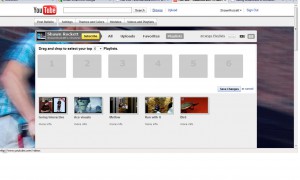
5. Now comes the easy part. When you’re done with setting up the background and visuals, you can start favouriting videos, creating playlists and putting in a channel description. To display your playlists, you need to click the “Videos and Playlists” tab and select which playlists you want displayed. You have to do this every time you create a new playlist and want it on your channel page.

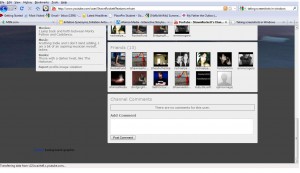
Under the “Videos and Playlists” tab, click on “Playlists” and then “Arrange Playlists” to decide  what order you want your playlists shown in.

You can click “Arrange Playlists” to edit the order of your YT playlists

You can also edit your playlists and arrange the order of individual videos by clicking on one of the playlist icons and then clicking “edit my playlist” (this last one took me a while to figure out).

I hope these nitty gritties are useful to any enterprising YT users out there. Good luck creating your personalized YouTube Channel page!

Things I’ve Learned Creating a Character for an Online Narrative

Erica presented Bronwyn, Liz and I with the project of creating a character for a blog for readers in their mid-teens. Being way out of my mid-teens, I found the task a bit daunting and wasn’t really sure I could create a narrative voice that sounded authentic and entertaining. Thankfully, I found that actually getting down to imagining and writing a character is loads of fun and not at all as hard as I expected it to be. Aside from being a creative delight, it taught (and continues to teach) me to appreciate the multi-platform possibilities of cyberspace narratives and the tools with which to manage them. These tools are invaluable to me as they teach me how to use the web space and control my own online presence.

Brainstorming about our character is rather enjoyable.            Photographer: Liz Kearsley

The first thing that really blew my mind about online writing was that I could bring in many different media into my story, making it a more interactive and immediate experience for readers. I’ve often been frustrated while telling a story to my friends that I just can’t describe that hilarious expression I saw so-and-so make, or an incredible stunt my cat performed, or why some songs send chills down my spine (“Writing about music is like dancing about architecture” – who said that?). Writing in cyberspace means that I don”t have to settle for only my description to convey the experience I am trying to share, but can bring my listener right into the moment of my cat’s star-jump with back flip with a picture, video or drawing (a talented cat must be appreciated, after all).

Also, using different media brings the reader into the process of my story, so that I can document the many stages of building an enormous Lego castle, making my own toga, or what have you. In the web space, I can choose how intimately I want my reader to know the details of an experience, real or imagined, sharpen my tech skills by weaving other media into the page, and also learn the importance of using social media effectively. Having this ongoing story-space also keeps me alert to funny stories during the everyday so that I can appreciate the happenings around me as I would not otherwise. I have to say that I really enjoy this shift in perspective.

I’m really excited about sharing the product of our joint creative efforts at the Narratives in Cyberspace workshop AhimsaMedia is hosting next week at Capilano University, designed specifically for youth. Through trial and error, we discovered many tweaking tips that would save fellow storytellers a lot of time (and I admit, frustration); I’m also really pleased to have the opportunity to tell others the tools and tricks we learned navigating various social media platforms and our experiences creating our character and her story.  If you’d like to register for the week-long Narratives and Cyberspace workshop, click here. We’d love to see you there!

Copyright, Social Media & Orphan Works – Advice for Protecting Your Photos

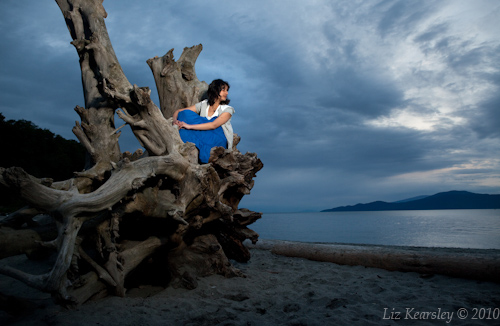
© Liz Kearsley 2010. Bronwyn Malloy on Spanish Banks, Vancouver. Shot for Ahimsa Media

Many photographers have become fearful of the internet, in recent years.  It is a double edged sword, a great tool for getting our work seen by a wider audience, but it’s also hard to track images, copyright infringements and keep up to date on where and how to safely display our portfolio.

I was rarely lucky to be trained in photographic law, the importance of retaining copyright and it’s worth.  However, with an increasing number of people entering photography from a range of backgrounds, it is becoming vital for us all to keep up to date on the legalities of copyright and how the internet affects your rights as a photographer.

The easy part first: if you take a photograph, whatever it is of, (unless you agree e.g. through a staff job or by written contract) you own the copyright.  You do not need to register your photographs in order to activate it.  However, if you are uploading images to online sites or submitting to any news outlets, competitions … etc. you must, must read the terms and conditions as many will remove all of your rights.

There is infinite depth to this topic, so today I am going to try to simply highlight a few key issues that are likely to affect the majority.

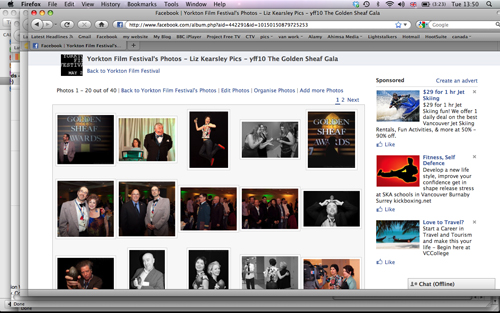
A screen shot of one of Ahimsa Media client Yorkton Film Festival’s watermarked albums on Facebook

The most prevalent image outlets in my mind are the ever growing social media sites. They are wonderful tools for connecting with friends and networking, but are not designed to protect the photographer, quite the opposite. Take for example Facebook, they have been recently hitting the headlines due to the site’s privacy laws. From a photographic point of view, their terms have another massive problem. Every time you upload a photograph to Facebook you agree that :

“For content that is covered by intellectual property rights, like photos and videos (“IP content”), you specifically give us the following permission, subject to your privacy and application settings: you grant us a non-exclusive, transferable, sub-licensable, royalty-free, worldwide license to use any IP content that you post on or in connection with Facebook (“IP License”). This IP License ends when you delete your IP content or your account unless your content has been shared with others, and they have not deleted it.”

What this means is that as long as your photos are on Facebook, they can be used by Facebook without paying you. They don’t prevent you selling elsewhere, but can use your pictures for free.  For this reason I ensure any content I place on facebook is watermarked.  Of course, the vast majority of snaps we put on Facebook are not commercially viable, so you have to decide what you don’t mind being used by others.

Facebook terms, however, are not the only thing we should be fearful of.  An even more worrying feature for the future is the stripping of photograph metadata, and as a result the loss of all copyright contact information.

Metadata is a photograph’s embedded information.  It is contained within the photograph and is there to inform the viewer / potential buyer how the photo was shot, by whom and what it is of.  Some of this data is automatically recorded by the camera (it does depend on which camera you have, how much, if any, is recorded).  For example, the camera settings, f-stop, shutter speed, ISO.  Other information is inputed by the photographer using editing software, like Adobe Photoshop or Lightroom.  We use this to record our copyright information, website, keywords, captions. … etc … etc.   It ensures that anyone who may wish to use your image knows who to contact for permission.

A screen shot of an image in Adobe Photoshop with the metadata box (file info) open to edit.

In the past (and even at current), metadata has been enough to cover us legally should anyone try to use a photo without permission, as you have included your contact information and if they do not follow up it is a copyright breach on their part.  However there are new laws in the works in both the US and UK relating to Orphan Works.

Without getting too technical, in the last 12 months, both countries have come close to passing bills, which if passed, would have legislated the commercial use of any photograph whose author cannot be identified through a suitably negligent search (an orphans work).  That would mean anyone could use any of your photographs that are not watermarked or do not contain metadata.  Currently strong industry opposition has prevented this legislation, but many think it is only a matter of time before it becomes a reality.

In layman’s terms and in the words of Copyright Action, this is what this bill would mean:

Essentially, if photos were cars, so long as the numberplate is missing (or you can get rid of it and claim it was missing), you’ll be able to legally TWOC and use it on payment of a fee to the Government.

And facebook is not the only one to strip your metadata. Most social media sites and blog providers strip that data too. Why? Because doing so saves a little bit of space per image, and with millions of uploads, site providers think this is worthwhile.  They realize few people are aware of the affect that this could have, and I must admit before writing this post, even I was unaware of the extent of sites stripping data.

US photographer, David Riecks, has been doing some research into metadata stripping and his early results shocked me.  He has created Controlled Vocabulary to document tests on different sites and see how they change photo uploads.  As expected, Facebook, Twitter and Google Docs removed all metadata. Flickr retained the content (despite my hearing comments to the contrary).  Currently getting mixed information with blog, like WordPress and Blogspot, so testing that further.  Will get back to you with my findings.

If you are worried about your rights and the law regarding your images, there are a few ports of call I try to keep an eye on: firstly Carolyn E. Wright’s photo attorney website, as she is uniquely useful being a full time photographer attorney, who is also a professional photographer.  Out of Britain I have found EPUK invaluable.  They deal primarily with the editorial market, but their sister site Copyright Action contains a great deal of useful basic information for both photographers and image buyers.  And finally Pro-imaging is great for a variety of information.

Photo Editing for the Interactive Audience

Alyzee Lakhani on Spanish Banks beach, shot for Ahimsa Media.

Caption accuracy and editing used to be the main tasks us photographers had to focus on following a shoot.  Today that has all changed.  With a multitude of platforms to display our photographs, most freelancers now have to get to grips with internet distribution too, on sites like photoshelter, flickr and stock agencies.  As a result intelligent and extensive keywording has become a vital tool.

My newspaper background means that I have always been most at home with the new agencies for any sales beyond a newspaper or magazine.  I, like many British press photographers, have many photographs listed with Alamy, yet as my client list widens so do the places I display my work, and with that I have found my workflow techniques evolving.

Everyone has their own process of editing using different software, be it the camera’s e.g. Nikon Browser, professional e.g. Adobe Lightroom or computer based e.g. iphoto.  I use Adobe Lightroom and have found it is a great time saver for multi-use captioning and keywording, as well as embedding photographer information into your images prior to editing.

However it was not until I uploaded our coverage of the 2010 Yorkton Film Festival to flickr that I discovered just how much time can be saved by properly preparing your images.  I’ll use Lightroom processes here as an example, but different software has similar options.

When I open up Lightroom 2 and attach a memory card an option box pops up (see below).  It includes a variety of things you can input for the entire photo batch.  In the local newspaper game each download usually involved several jobs so I wouldn’t fill much of this in, bar my copyright information, (which I have pre-programmed) so I would put in minimal keywording or captioning then download the pictures.

A lightroom screen grab of opening page information

This has recently changed when I realised just how much time can be saved by keywording each image prior to upload and to batch keyword jobs initially. One reason for this is that on flickr you must place quotation marks around each phrase longer than one word to tag or keyword and then a simple space between single words.  Whereas, most other systems use the simple comma to separate phrases.  As a result most of us need to continually remind ourselves to use this method, and it can become awkward when cutting and pasting repeating words.

Whereas, in Lightroom you can place your group keywords in that initial download and then easily add individual words whilst editing.  Take for example the image below:

Screen shot of Adobe Lightroom 2, with keywording options open

On the right hand side of the page the panel gives a variety of keywording options.  You have a list of the keywords already attached to the image (from initial download), then a section to add more, and options for the programme to remember past keywords in groups for you.  It allows you to easily click and add without re-typing.  I tend to keep that option on recent keywords, due to my varying shoots.   Below the keywording panel, is also a keyword list, with ALL your past keywords, which can be handy if you forget spellings. Below this is a section detailing your metadata.  The metadata is crucial picture information: copyright information, caption and shooting data.  This can be edited at either the download section, or within Lightroom. You can also input it in Adobe Photoshop.  (I will explain in a further post the importance of metadata in relation to copyright theft and in particular facebook)

I have found that inputting all of this information into Lightroom significantly speeds up my uploads and keeps my files up to date should I wish to use the photos on a different outlet.  It also means that my contact information stays with my image (bar placing on facebook) so if you wish to upload to various sites you do not need to keep typing the same information.

Embedded information is also very useful should you later wish to put the pictures onto a blog, for example using WordPress.  It can help bring further traffic to the site, because the photos keywords are also added to the SEO of the post.

Exciting Times for Media

Times are a changing in the Media World and we are highly excited by some of the most recent evolutions.   Particularly here in Canada where the new Canadian Media Fund (CMF) has been announced bringing in an experimental element. This is a perfect opportunity for members of the digital media community to get funding and branch out, trying new projects that funds would not have previously been available for.

This is the first year such funding options have existed here in Canada and although the fund’s guidelines are still evolving, it is this open invite for submissions that we feel can allow the creative juices to follow.  The CMF are also widening their view towards the advantages of transmedia storytelling for their more traditional television fund with the convergent program.  This provides exciting opportunities for traditional media to discover new avenues with their storytelling and really have fun with the new challenges and opportunities that the changing landscape of media offers.

In keeping with the times, the Yorkton Film Festival has really embraced the idea of Interactive Storytelling, and has contracted us to help them to tell their online story.  They are rebranding their image, doing a bit of marketing for the festival and the Golden Sheaf Nominees, and acting as a case study example to festival delegates of how interactive tools can be incorporated into their stories.  Way to go Yorkton!  And thank you for inviting us along for the ride!

To follow along on the Yorkton Film Festival’s online story, check them out on:

In keeping with this model of forward thinking and moving towards the future of media, the Yorkton Film Festival is hosting some great workshops on Friday May 28th, 2010 aimed at thinking convergently, including a few with our own Erica Hargreave.  Here is what you can look forward to:

Friday May 28

  • 8.30 am – 9:00 am:  Blast Off – Social Media at the Festival, Ramada Yorkton

A look at telling the Festival’s story using social media and how filmmakers can use this to build the buzz around their productions, with Erica Hargreave.

  • 9:15 am – 10:15 am: Panasonic Workshop and Presentation, Ramada Yorkton

Panasonic Canada presents and discusses the latest Panasonic video cameras and technology, including notes and news on 3D.

  • 10:30 am – 12:00pm:  Let’s Play CanCon Convergence Roulette, Ramada Yorkton

A fun filled game show where panelists compete by trying to adapt new convergent technologies and applications to classic Canadian TV shows. Hosted by Robert Hardy. Panelists Cam Bennett, Trent Haus, Rob Bryanton, Brenton Sawatzky and Erica Hargreave.

  • 2:00 pm – 4:30 pm: Which Way To The Future? Ramada Yorkton

Spend an afternoon with some of the biggest names in the industry, as they try to make sense of and figure out where the rapidly changing screen based media industry is headed. Hosted by Richard Gustin. Panelists Cindy Witten, Daniel Cross, Norm Bolen, Valerie Creighton and Rudy Buttignol.

Saturday May 29th, 2010 at the Yorkton Film Festival hosts some always needed industry staples, putting you face-to-face with the broadcasters, talking finance and actual production, and discovering how to get your proverbial foot in the door.

Saturday May 29

  • 8:30 am – 9:00 am: Blast Off – Social Media at the Festival Part 2, Ramada Yorkton

Explore ways to use social media as a storytelling device on your projects, with Erica Hargreave.

  • 9:15 am – 10:15 am:  Now’s Your Chance, Ramada Yorkton.

Table-hopping group discussions with industry leaders, broadcasters and distributors.  Ask the questions you’ve always wanted answered.  Join industry leaders for straight talking, small group discussions.  A rare honesty that Yorkton offers, unlikely to be found at larger festivals.

  • 10:30 am – 12:00 pm: Oh, Oh! They Said Yes – Now What? Ramada Yorkton

You’ve finally pitched a project that a broadcaster/investor likes enough to make an offer. Join the panel of experts as they share insights and ideas of what has to happen in order to get the proposal into a finished project. Hosted by Joanne McDonald. Panelists Stephen Onda and Peter Raymont.

  • 1:30 pm – 3:00 pm:  My Big Break, Ramada Yorkton.

Five successful Saskatchewan film and television producers discuss their first big “success” and how they found it (or how it found them).  Hosted by Bruce Steele.  Panelists Michael Snook, Jeff Beesley, Dennis Jackson, Melanie Jackson and Anand Ramayya.

Click here to register for this year’s festival.

We hope to see you in Yorkton!

Ooey Gooey Good Animal Tracks: Our Annual Holiday Activity

At Ahimsa, we have a tradition of sharing a yearly activity that can be enjoyed with friends and family, and you don’t have to be a kid to have fun with it.

One of my favourite winter time activities is animal tracking, especially in the snow.  I love finding animal tracks, identifying them, and creating stories of the critters that left the tracks behind on their travels. And animal tracks can be found anywhere in winter, even if there is no snow.  If there isn’t any snow, go hunting in the mud or on ground where the mud has hardened, for some tracks.

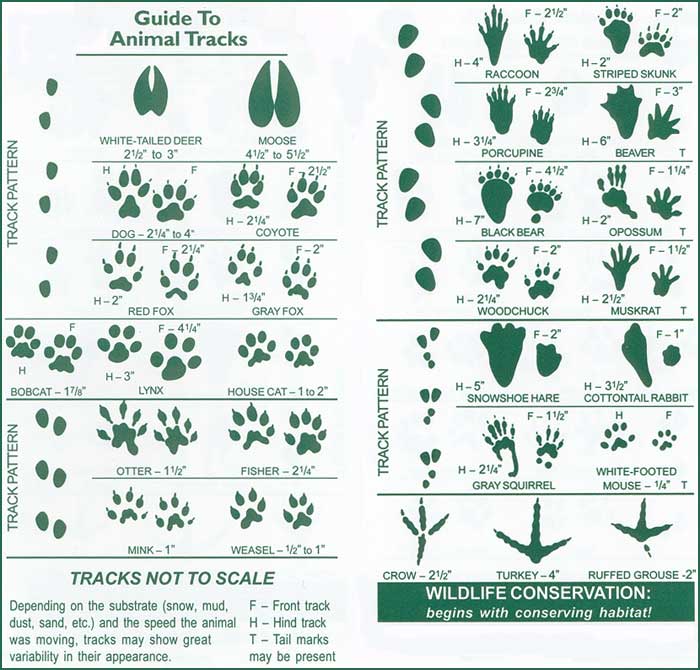
animal tracks

Here are some fun kitchen goodies that are easy for all ages to whip up and can help you to learn your animal tracks.

Peanut Butter Snack Tracks (A Tracey Temple Invention)

Recipe:

  • Mix ½ c peanut butter, ½ c icing sugar, 1 tbsp softened butter, and ½ c Rice Krispies together.

Activity:

  1. With your young ones or the young at heart, take a heaping spoonful of the peanut butter mixture, flatten the peanut butter ‘dirt’ and make the imprints different animal tracks in it, using the picture of animal tracks as a guide.
  2. Stick the peanut butter tracks in the fridge to harden.
  3. Whilst your peanut butter tracks are hardening, enjoy a winter walk and search for animal tracks, identify them, and create stories of the travels of the animals that left the tracks behind.
  4. Share your animal track stories and teach your family and friends some track id as you enjoy your peanut buttery snacks.

You can also find last year’s paper making activity here.

Happy Holidays!

The Gang at Ahimsa Media

Emme Out & About Kissing Calendars for Dyslexia

It’s been a year now since we pushed Emme Rogers out from behind her computer screen and out into the real world, and we are proud to see her flourishing in real life as well as cyberspace.  Like any proud parents, seeing your kid making their way in this world, and in this case, truly embracing the reality of cross-platform storytelling, is rewarding to see.

"Reading is Sexy" Launch Party

Emme at the Launch of Reading is Sexy (Photographer: John Biehler)

This Saturday we will be proudly looking on as Emme makes her debut in Toronto society, kissing calendars for dyslexia!  If you are in Toronto, come and meet Emme Rogers from 1 – 3 pm, Saturday December 19th at Ben McNally Books (366 Bay Street).  You can also support The International Association of Dyslexia and promote literacy by buying a Reading is Sexy calendar.  Calendars are on special for $18 at the event or $20, if you want to kick in an extra $2 to dyslexia. Cash or cheques will be accepted.

Stick around afterwards and Emme will be heading to a pub with anyone that wants to join her.  And knowing Emme, she will buy a couple of plates of nachos and a few pitchers of beer for the table.